Getting started with the SensGate
As you will soon discover, the SensGate is a highly multifunctional device and allows for several advanced uses.
But first and foremost, its main purpose is to easily communicate the data from the connected Dracal measuring instruments over a network (Wi-Fi or Ethernet) to one or more computers equipped with our DracaView software.
This guide is intended as an introduction to the subject, and aims to get your SensGate up and running quickly for the first time. To do so, we will establish the connection with a discoverable Wi-Fi network for which you have the password if this option is feasible for you. If this option is not easily and quickly possible due to your organization’s security constraints, we will show you how the SensGate itself can generate a secure subnetwork that allows data exchange with your computer and other SensGates. We will look at some easy and useful configurations, such as adjusting the time, changing the device name and saving a password. Finally, we will show you how to launch local recording tasks on the device, and how to retrieve the generated files from your computer(s).
Important Note The SensGate provides all the necessary configurations to connect to a secure network. However, the purpose of this guide is to get you up and running in a few minutes, even if you have to involve your IT support department later.
- 1. Starting up
- 2. Connection to a discoverable Wi-Fi network
- 3. Creation of a local subnetwork
- 4. Other useful and quick configurations
- 5. Launching a logging task on the SensGate
- Conclusion
1. Starting up
-
-
-
- Make sure you have the most up-to-date version of DracalView (3.1.1 and later)
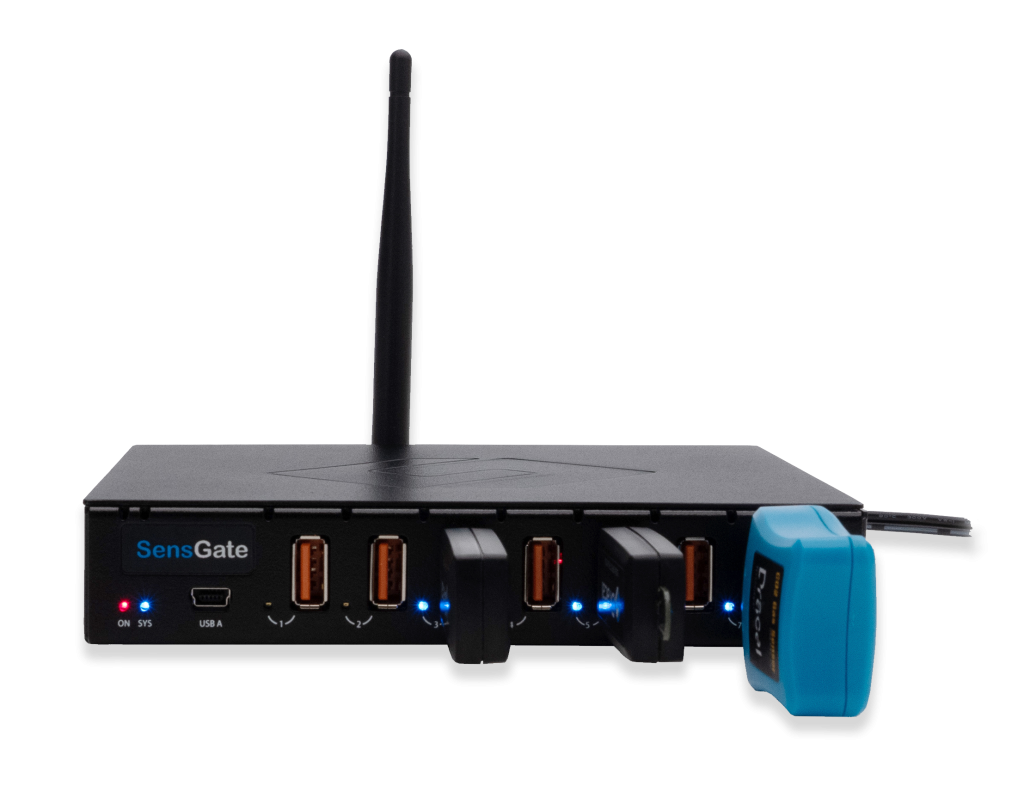
- Power your SensGate with the power cable provided with the product. Blue lights will turn on to indicate that the unit is powered up and ready to use.
- You can already connect Dracal measurement instruments to the SensGate in the ports numbered 1 through 7. If you have more than 7 instruments, simply use a USB HUB to expand your measurement capability.
-
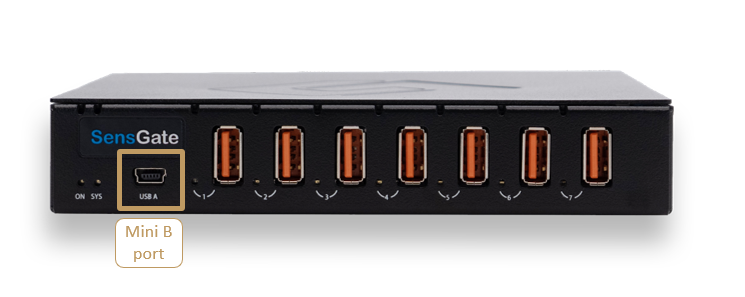
- For the very first start-up, connect your instrument to your computer via a standard USB connection. To do this, use the USB cable that you received with your instrument:
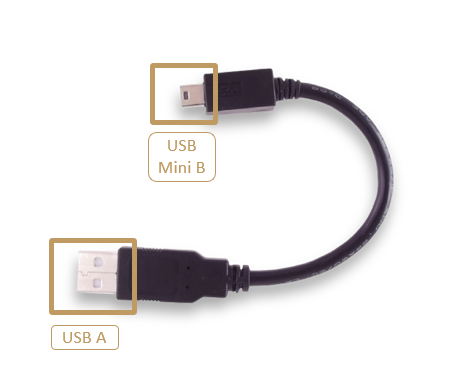
and connect the mini B tip to the USB mini B port on your Sens Gate. Connect the other end to a USB port on your computer.
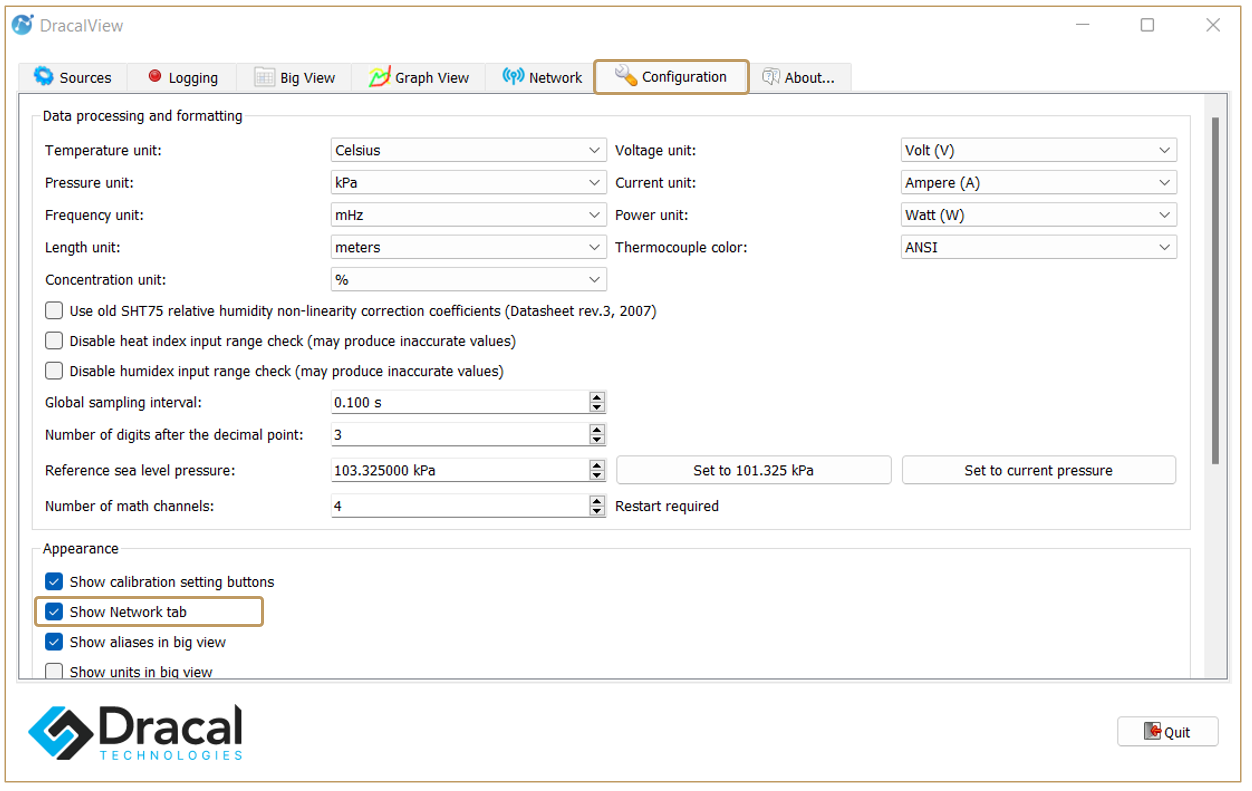
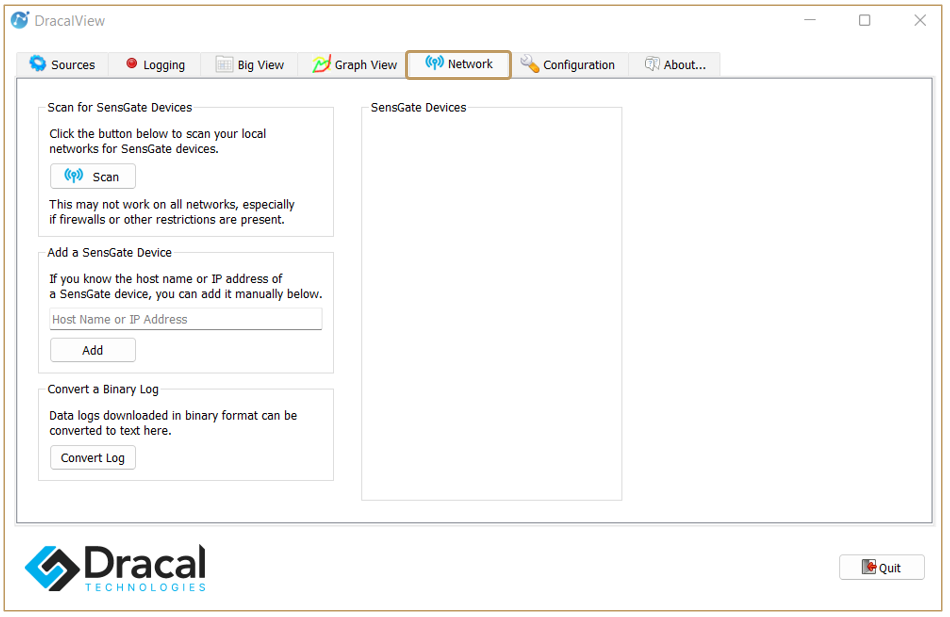
5. Launch DracalView and navigate to the “Network” tab.
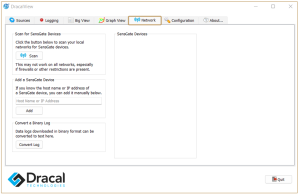
If it is not visible, simply go to “Configuration” and check the “Show Network tab” box
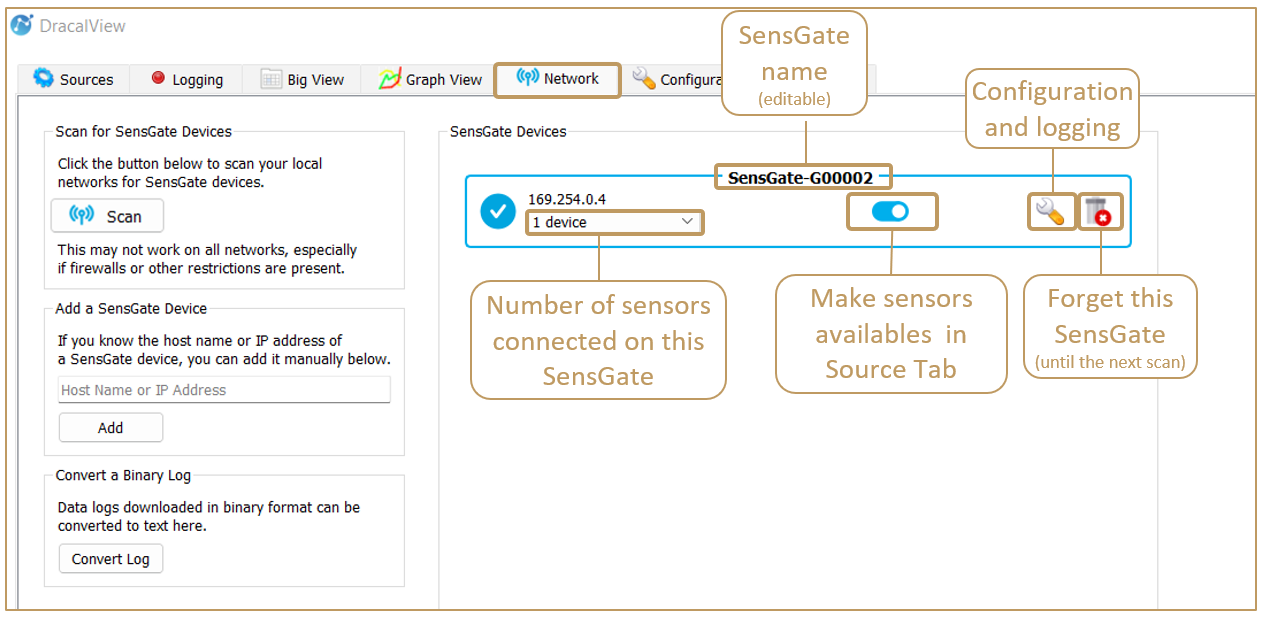
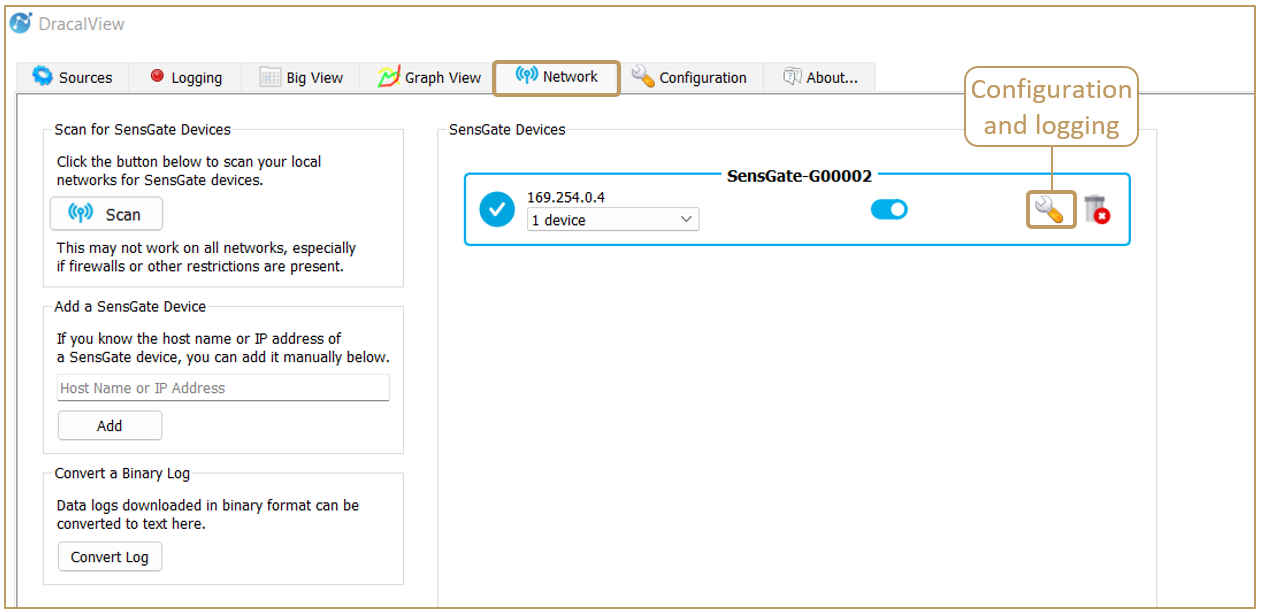
6. In the “Network” tab, click the “Scan” button.
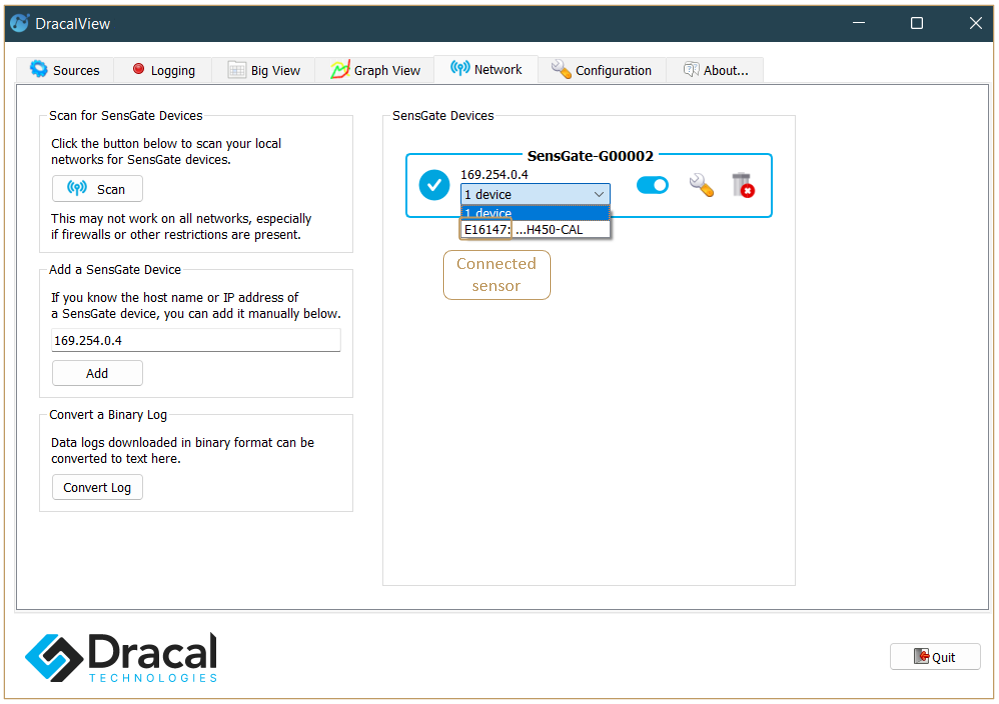
Your SensGate will appear in the window provided. Here is a brief description of the elements in this window:
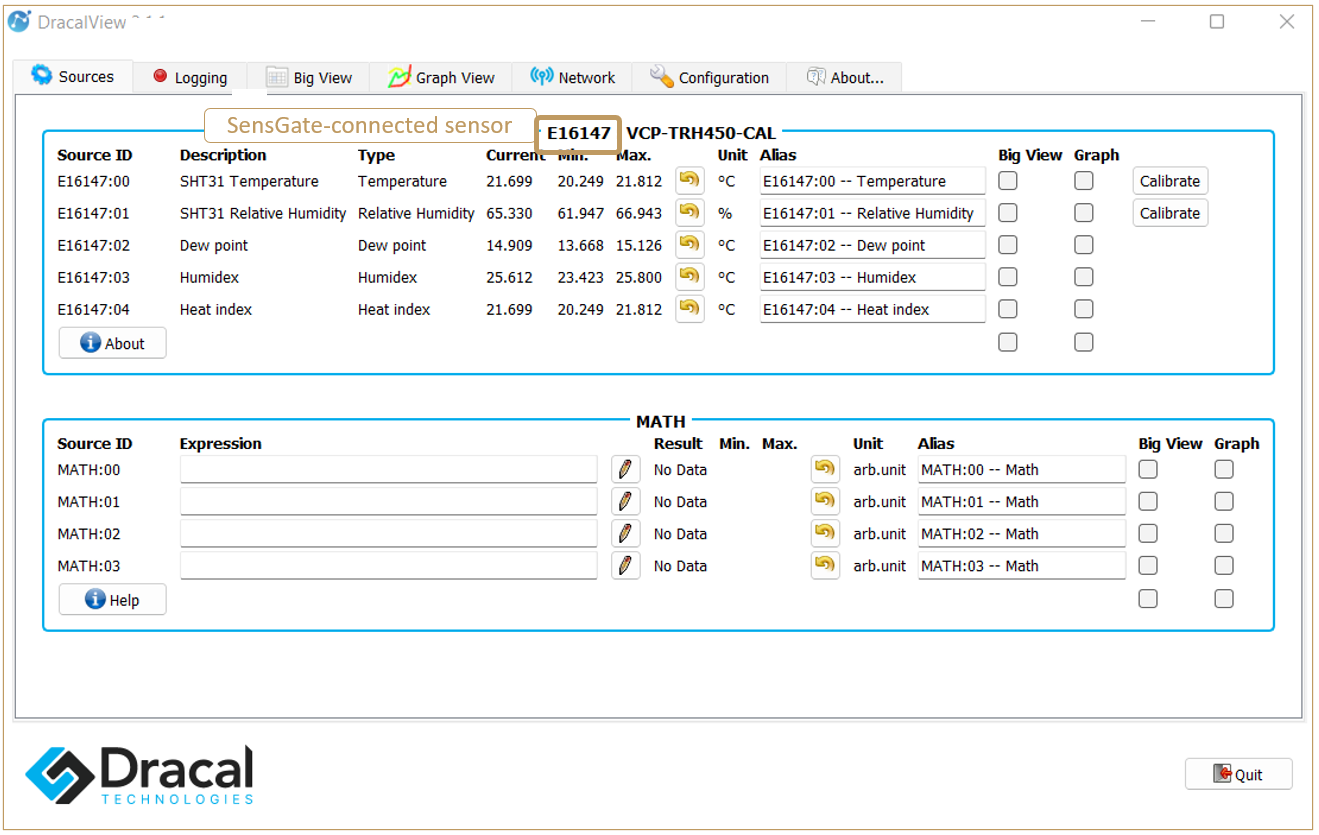
Following the connection of the SensGate, you will be able to confirm in the “Sources” tab that the sensors connected to your SensGate are already available and ready to use, as illustrated below:
2. Connection to a discoverable Wi-Fi network
In DracalView, click on the access button for your SensGate:
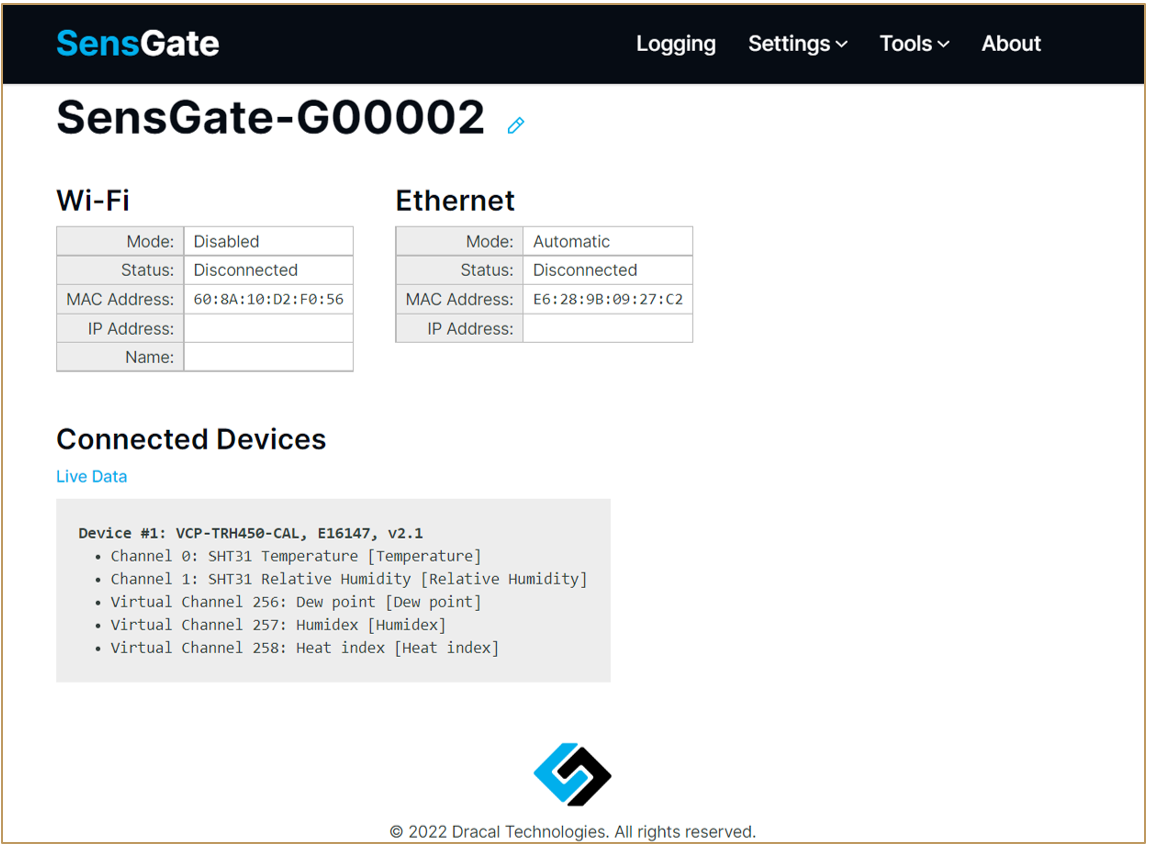
The SensGate administration page will open in your favorite web browser:
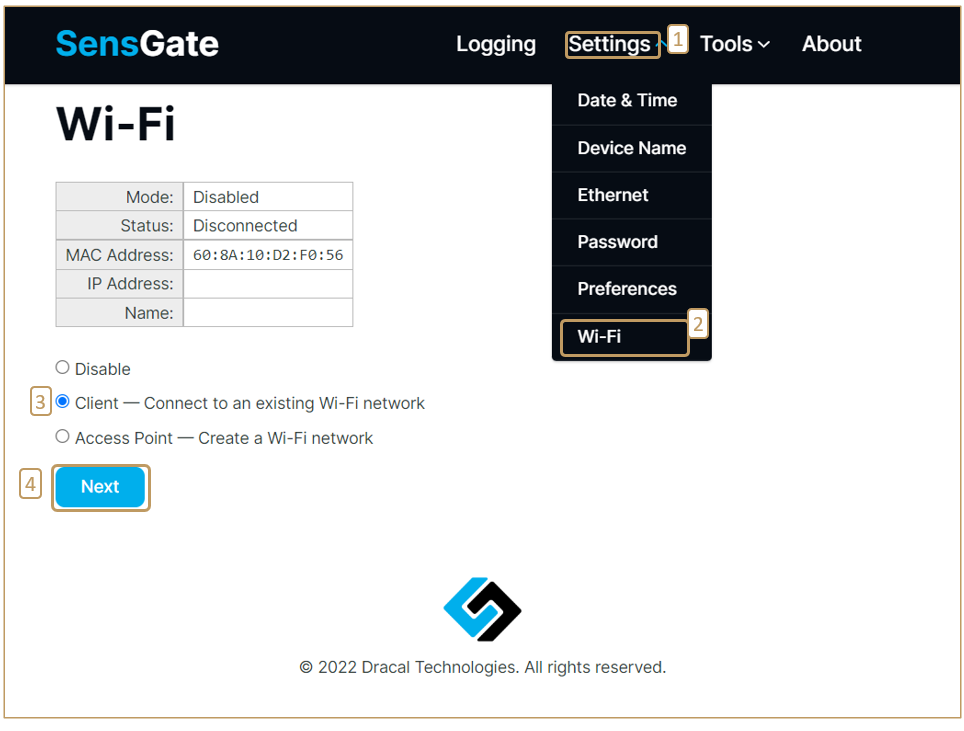
To discover your Wi-Fi network, go to Settings, then Wi-Fi, select “Client” mode and press “Next”, as shown below:
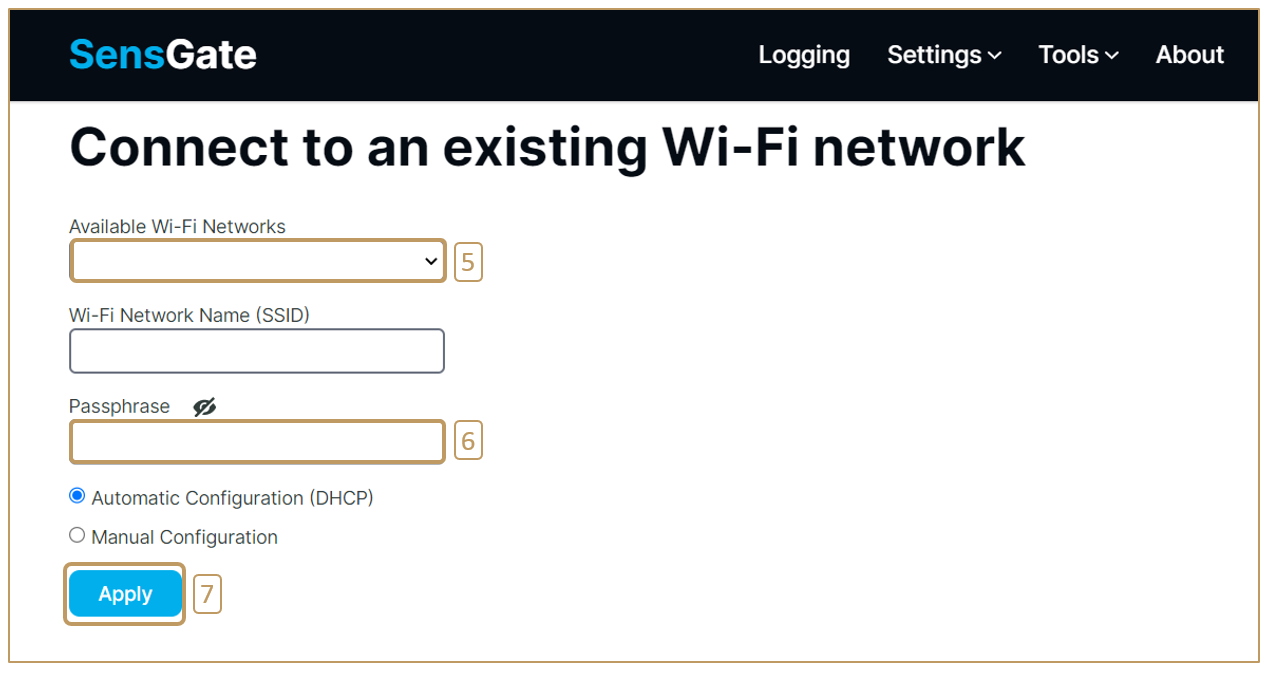
Then choose the network of your choice and click “Apply”.
That’s it! You can now remove the USB cable that connects your SensGate to your computer and move your SensGate anywhere it can connect to the network. From now on, you can access it without limit, from DracalView.
After successfully connecting to the Wi-Fi network, and removing the USB wire, you can now restart DracalView and perform a “Scan” task again. You will now see the instance of your SensGate connected via Wi-Fi.
Note: No matter how many active connections a SensGate has to a single computer (it can be connected simultaneously via USB, Ethernet and Wi-Fi), a Dracal sensor connected to the SensGate in question will only appear once in the Sources tab, as expected.
3. Creation of a local subnetwork
In some situations, it is not possible to quickly and easily use a pre-existing Wi-Fi network to communicate data from a SensGate to a computer. In this case, the SensGate allows the creation of its own protected network, to which up to seven other devices, including other SensGates and computers, can connect.
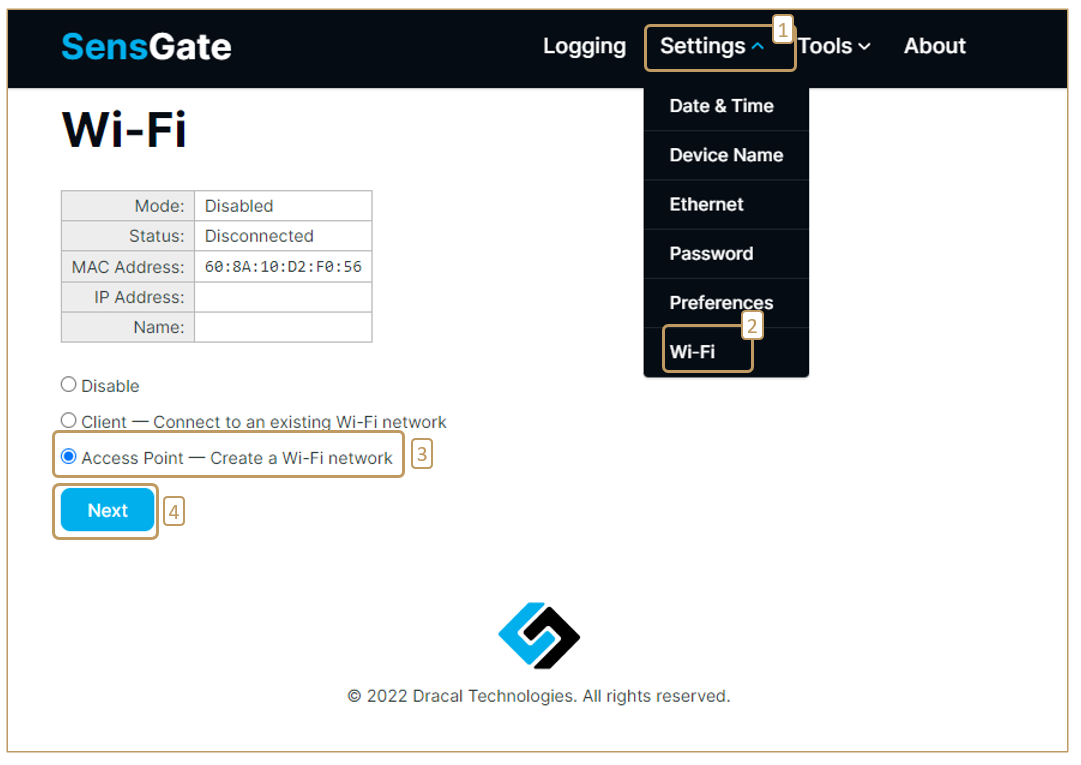
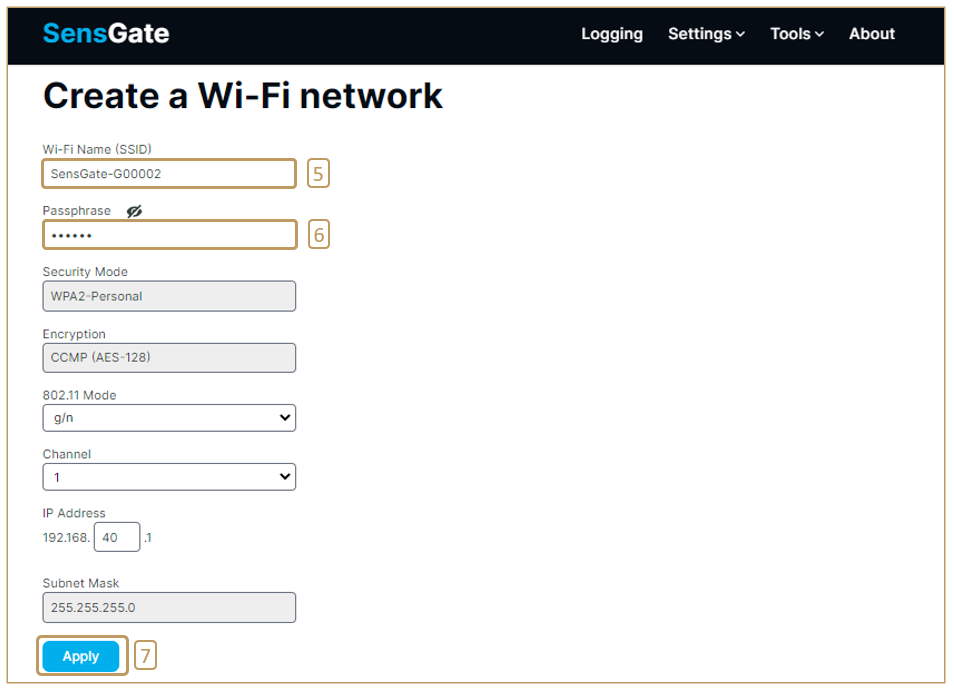
When a SensGate creates such a network, it is in “Access Point” mode. Here are the steps to follow to create such a secure subnet:
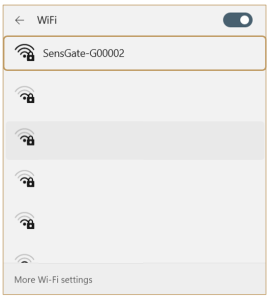
The Wi-Fi network thus created is now discoverable by your computer, tablet, smartphones,… and other SensGates:
Don’t forget: In order to access your SensGate data in Access Point mode, your computer (tablet, smartphone,…) must also be connected to the network.
4. Other useful and quick configurations
Here are 3 quick and useful configurations that we recommend you consider when you first turn on your SensGate.
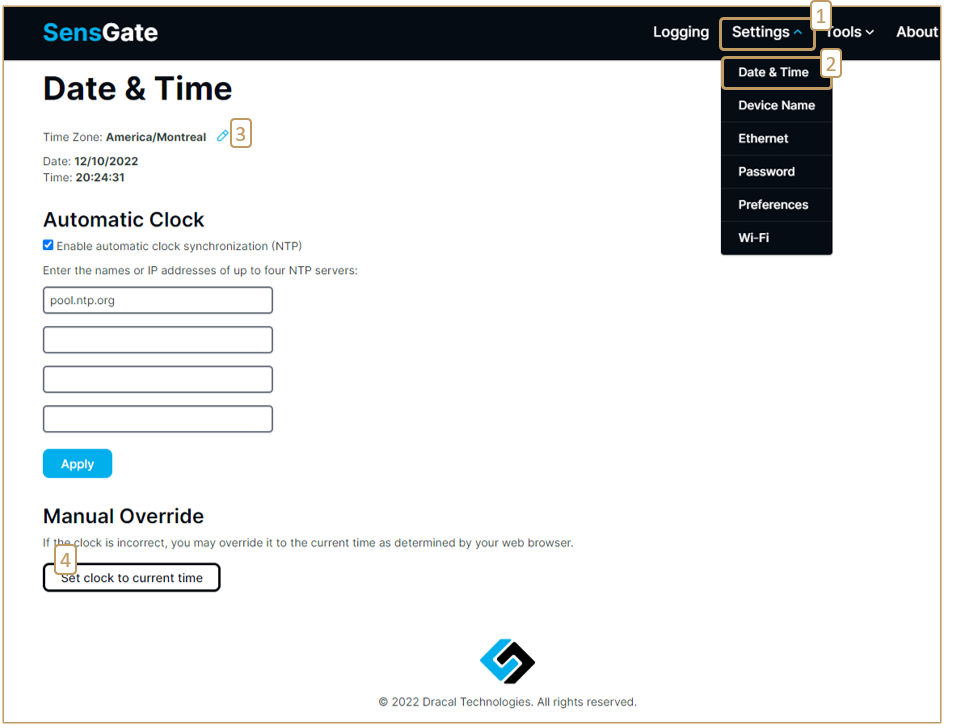
4.1. Updating date and time
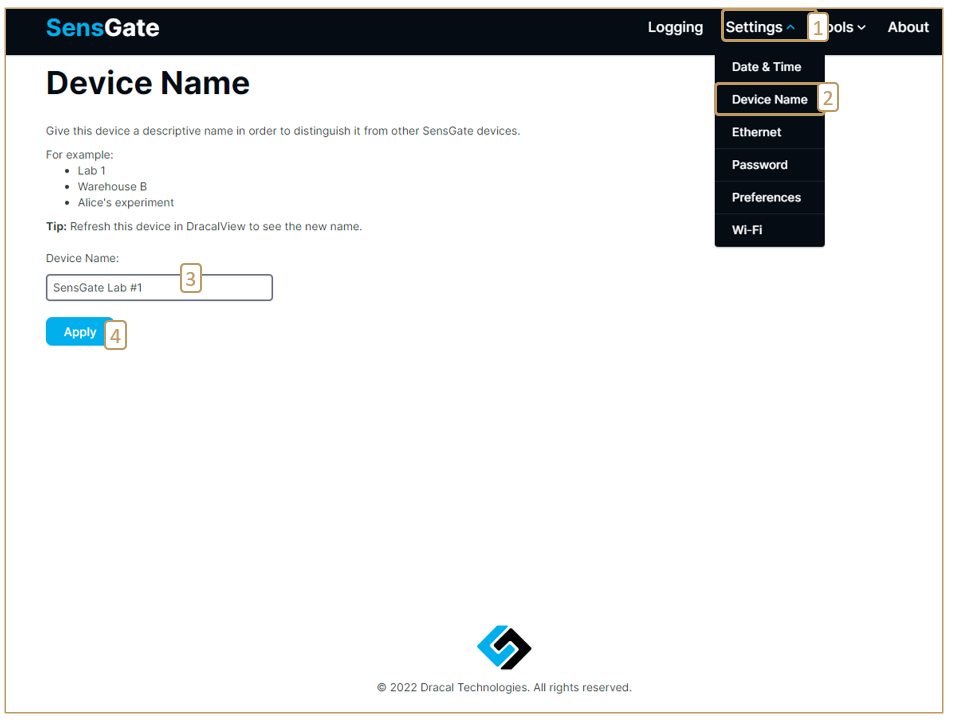
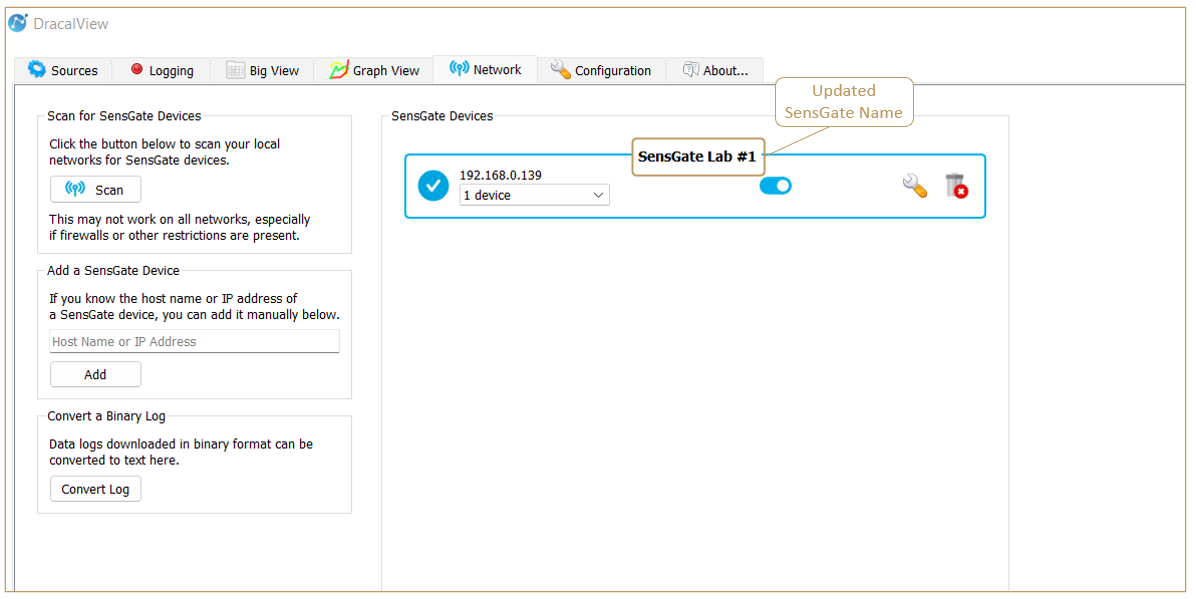
4.2) Changing the name of your SensGate
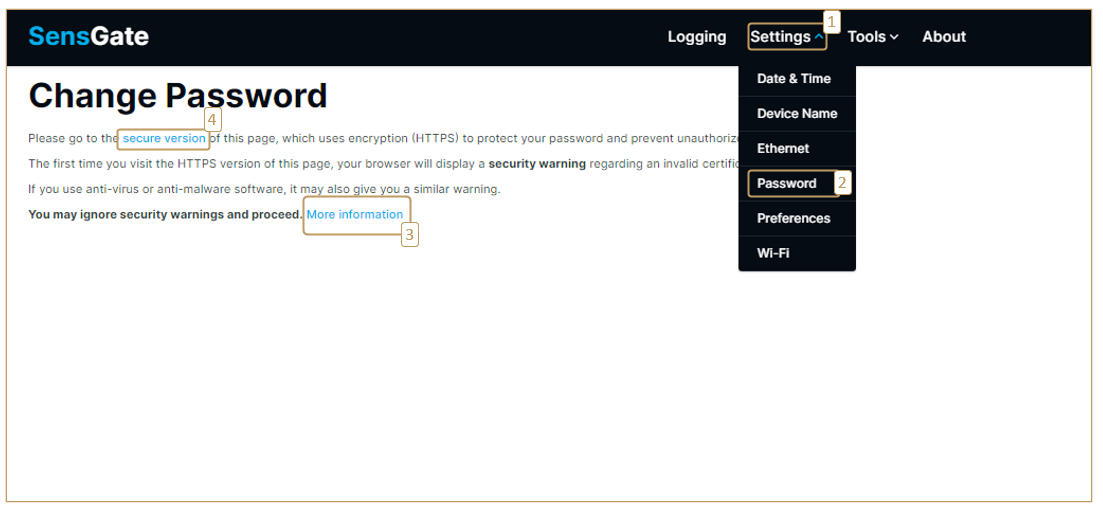
4.3) Password protection
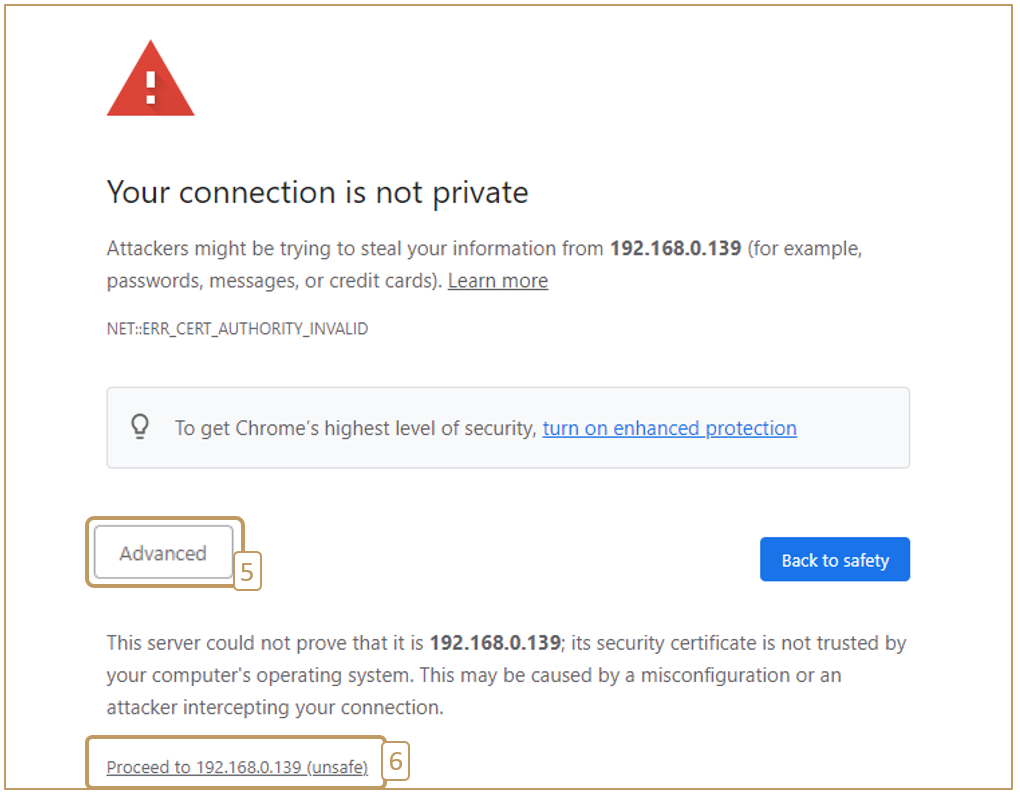
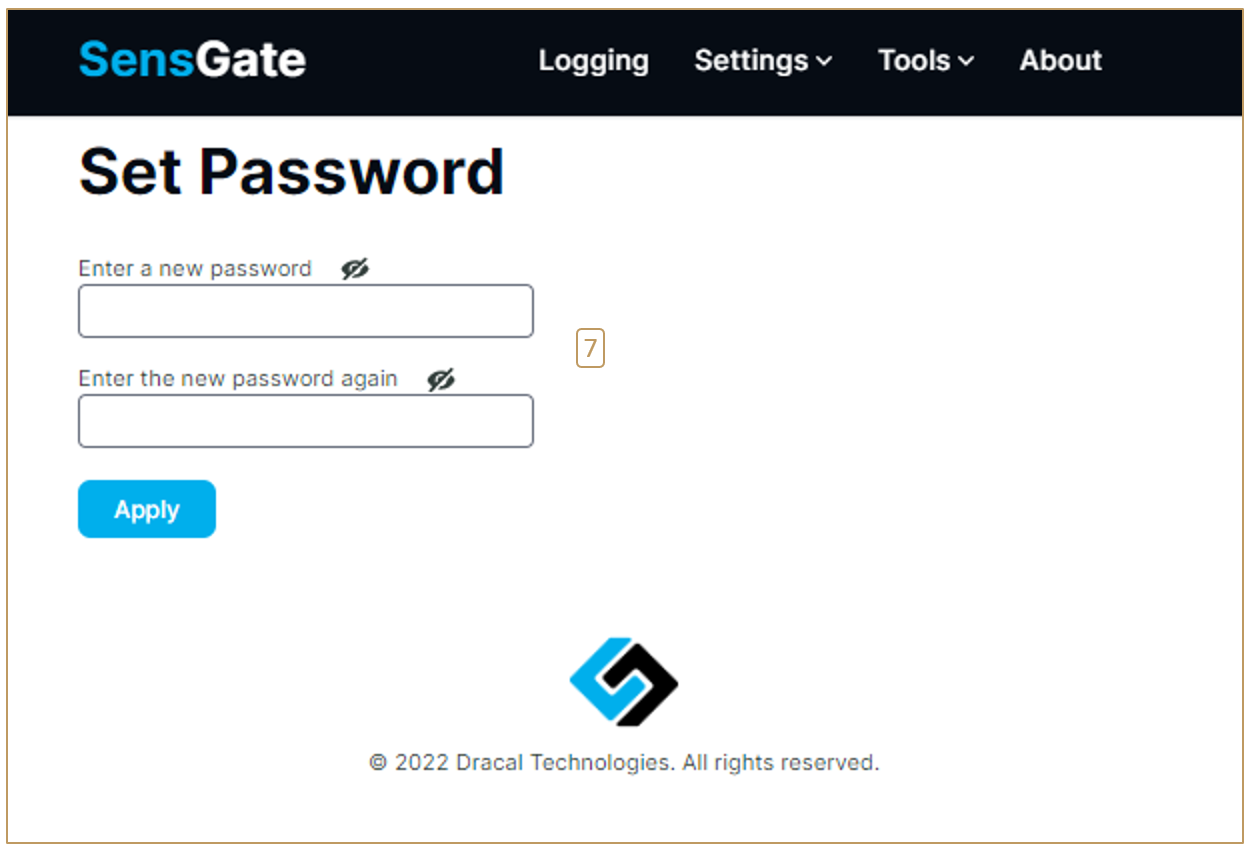
Your SensGate can be password-protected, as illustrated below. This security barrier applies to the entire web interface and prevents unauthorized access to your SensGate’s configuration parameters (communication configuration, logs, updates, etc.).
However, this security barrier allows anyone who 1) has access to the network on which the SensGate is located and 2) knows the SensGate’s IP address, to passively listen in on the data from the instruments connected to it.
It’s up to you to determine whether 1) uninvited entities can connect to your network, and 2) if, even out of context, the measurements returned by your instruments may contain critical information.
For maximum security, it should be noted that, independently of password security, the configuration of any instrument connected to a SensGate cannot be modified remotely, be it DracalView, dracal-sensgate-get or the REST API RVCP. This includes instrument calibration and communication protocol (USB or VCP). These configurations must be made via a direct USB connection to the instrument.
Caution: Be sure to store your password in a secure vault, as the SensGate does not provide a mechanism for recovering a forgotten password. If you forget your password, a complete reset of the instrument must be performed, and all current and completed recording tasks on the instrument will be deleted.
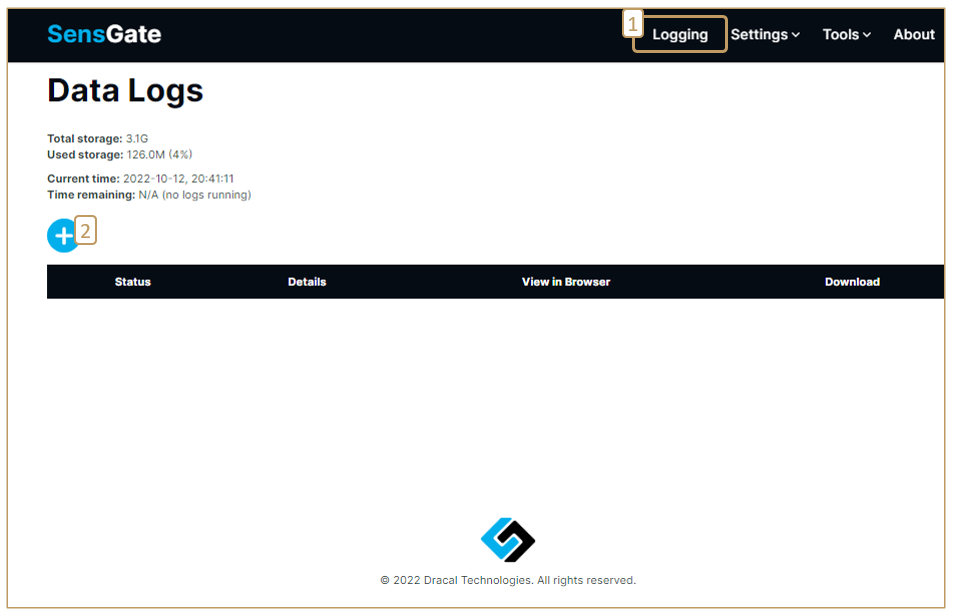
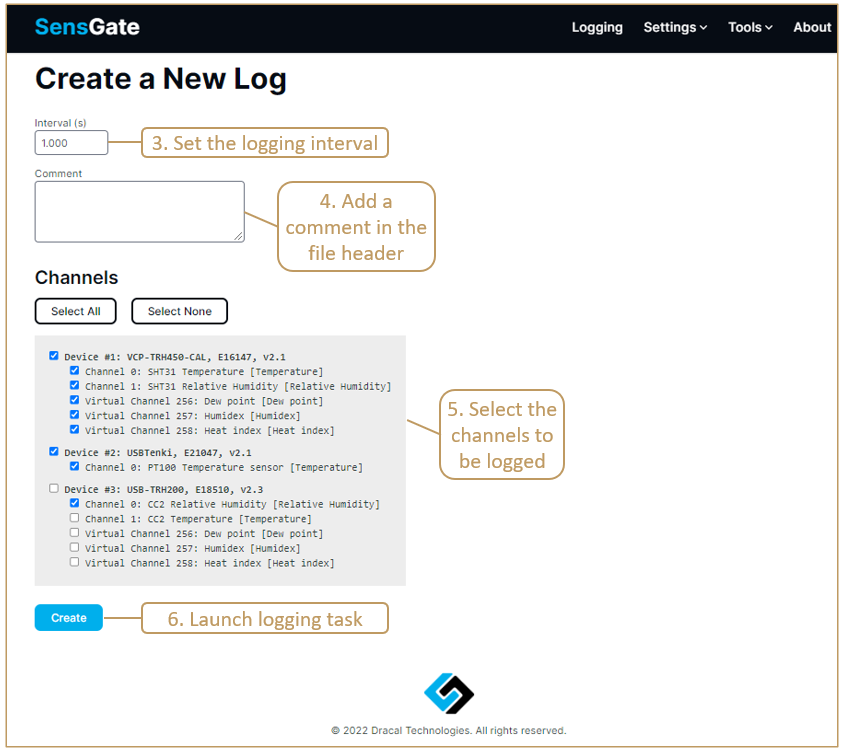
5. Launching a logging task on the SensGate
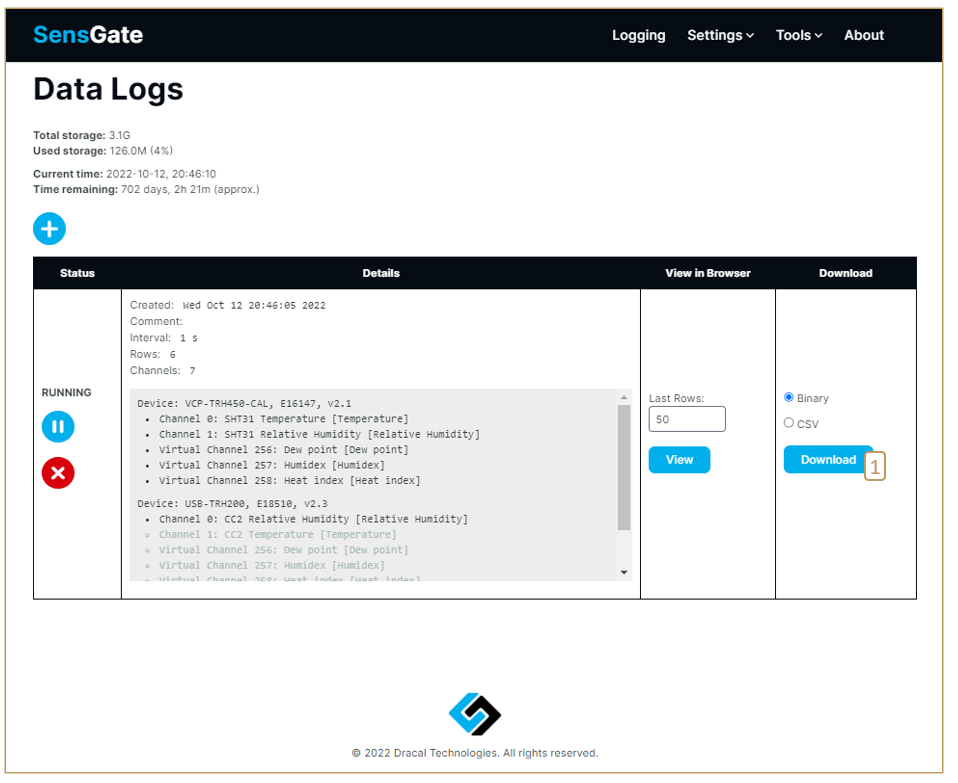
To launch a logging task, navigate to the “Logging” tab on your SensGate and follow the steps shown below:
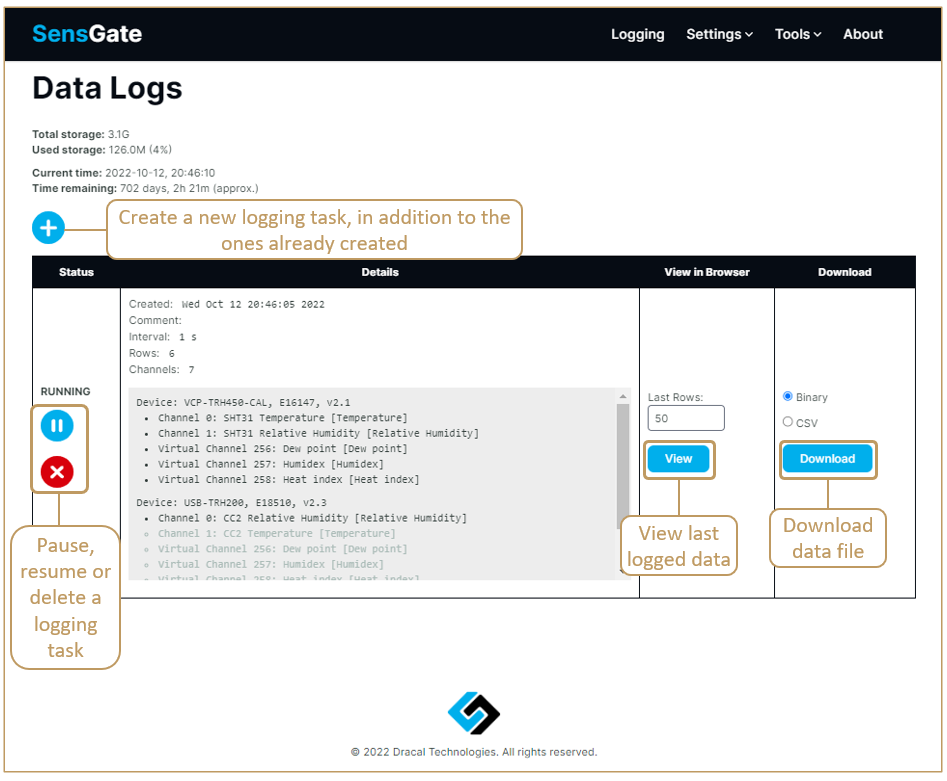
Here is an illustration of the items available in the logging task management window:
Convert a binary log file
Log files can be exported in either .csv or binary format. Exporting in binary format is considerably faster than exporting in .csv format and is recommended whenever possible. Here’s how to convert a binary log file in Dracal format to a .csv file from your computer:
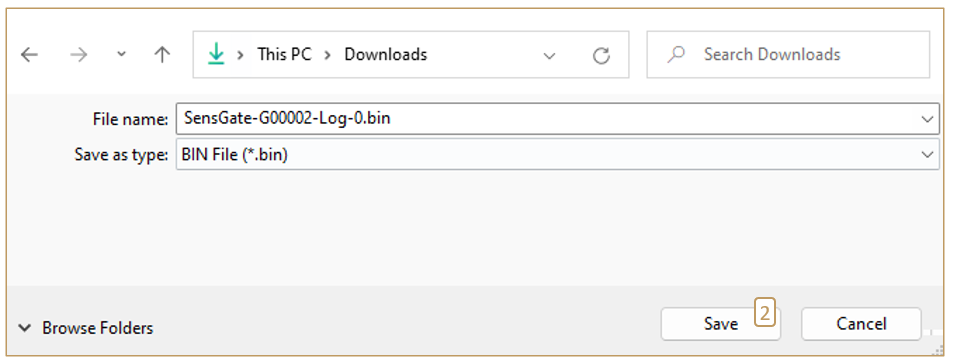
- First, download the file to your computer;
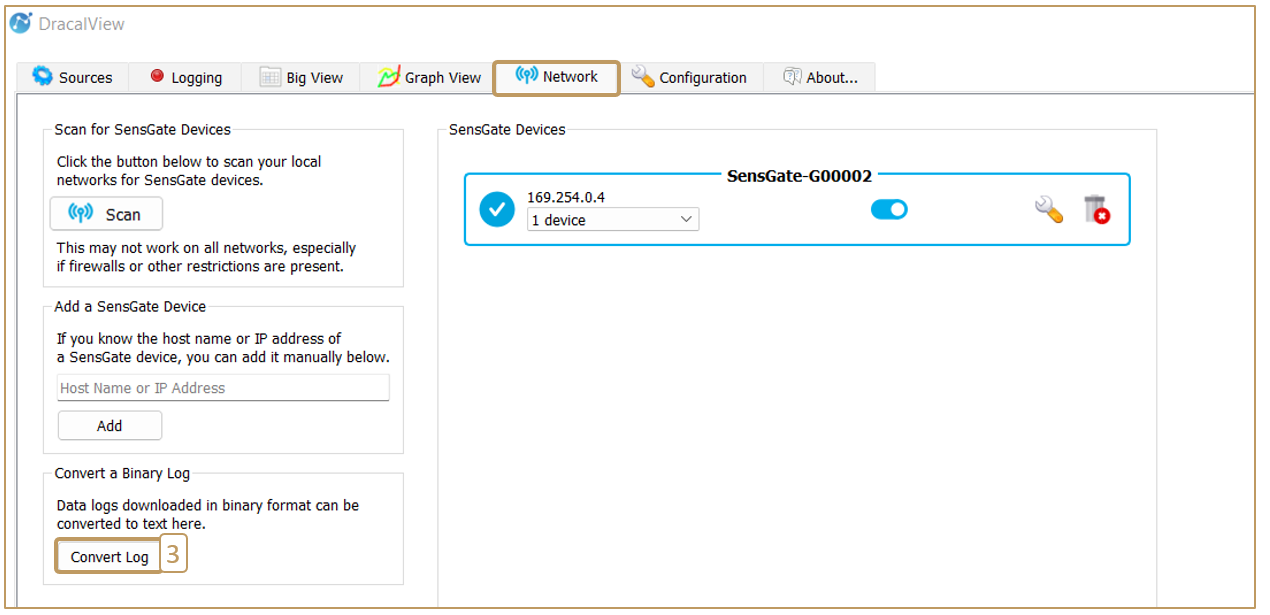
- In DracalView, navigate to the “Network” tab and click the “Convert Log” button;
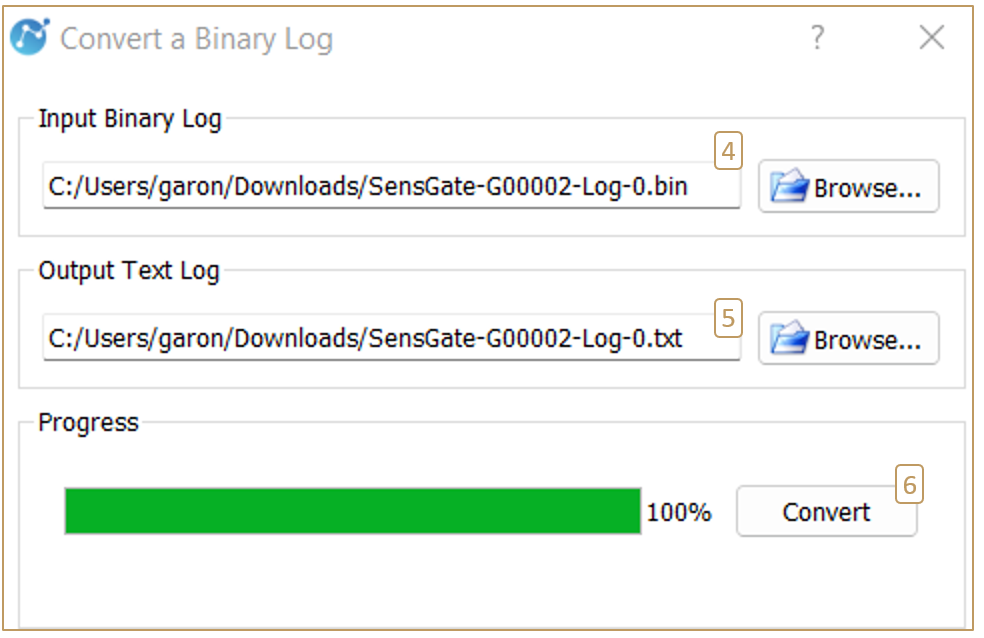
- Select the binary file to be converted and determine the location and name of the converted file;
- Click “Convert”.
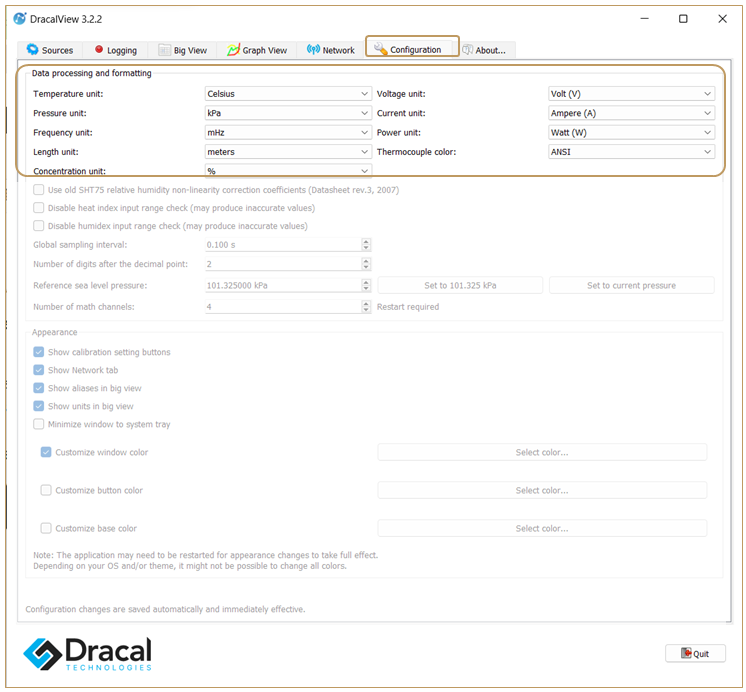
The magic of SensGate: What if you haven’t recorded your data with the right units?
In the DracalView Configuration tab, choose the desired units. Then, convert the binary file again, as shown in the previous section. No manual conversion, no data loss, no “find and replace” needed. Everything is automated to save you valuable time.
Conclusion
This concludes our tour of the SensGate, for a quick first use. Depending on your work environment and security constraints, some of the automations used in this guide may not be possible, such as the network scan or the automatic detection of available Wi-Fi networks. In these cases, additional help from your network administrator may be required. If you need additional support in getting your SensGate up and running, please contact us.
-
Always offered at no extra charge with our products!
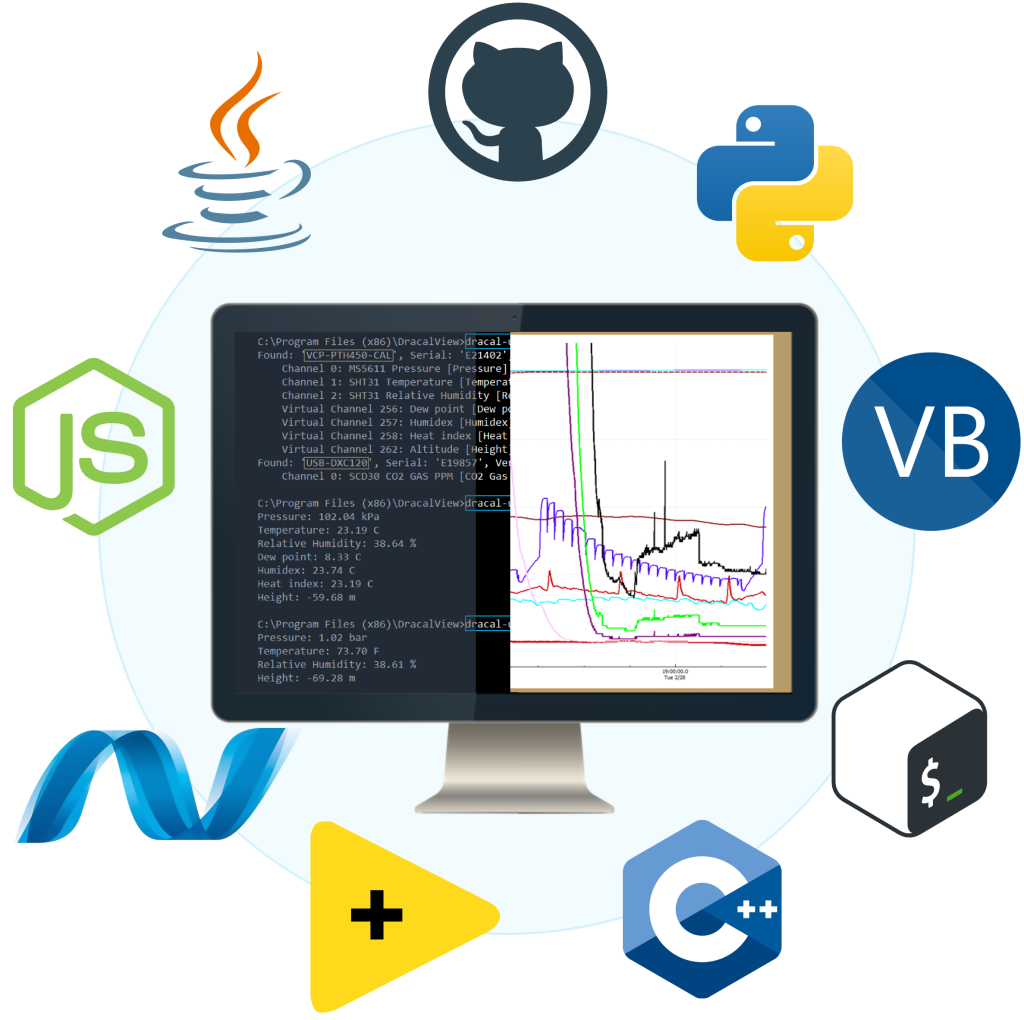
EASY TO USE IN YOUR OWN SYSTEM
- Ready-to-use, accurate and robust real-time data flow
- Choose the interface that works best for you (CLI, virtual COM, REST API, MQTT Publisher)
- Code samples available in 10+ programming languages (Python, C/C++, C#, Java, Node, .Net, etc.)
- Operates under Windows, Mac OS X and Linux
- Usable with LabView (CLI guide, Virtual COM guide)
- All tools packaged within one simple, free of charge, DracalView download
FREE DATA VISUALIZATION, LOGGING AND CALIBRATION SOFTWARE
- Get up-and-running in less than 3 minutes
- Operates under Windows, Mac OS X and Linux
- Real-time on-screen graphing and logging
- Log interval down to 0.5 second and configurable units (°C, °F, K…)
- Simultaneous use of unlimited Dracal sensors supported
- Simple user-calibration (products with the -CAL option)
- Connectivity with SensGate Wi-Fi/Ethernet gateway
Not sure if your project will benefit from Dracal’s solution?
Contact us, tell us about your project, and we’ll quickly determine if there’s a fit.
"*" indicates required fields
PRODUCTS YOU CAN TRUST
Approved by engineers, scientists and researchers around the world.
Thousands of companies trust our products worldwide: