How to use Dracal sensors with a Raspberry Pi?
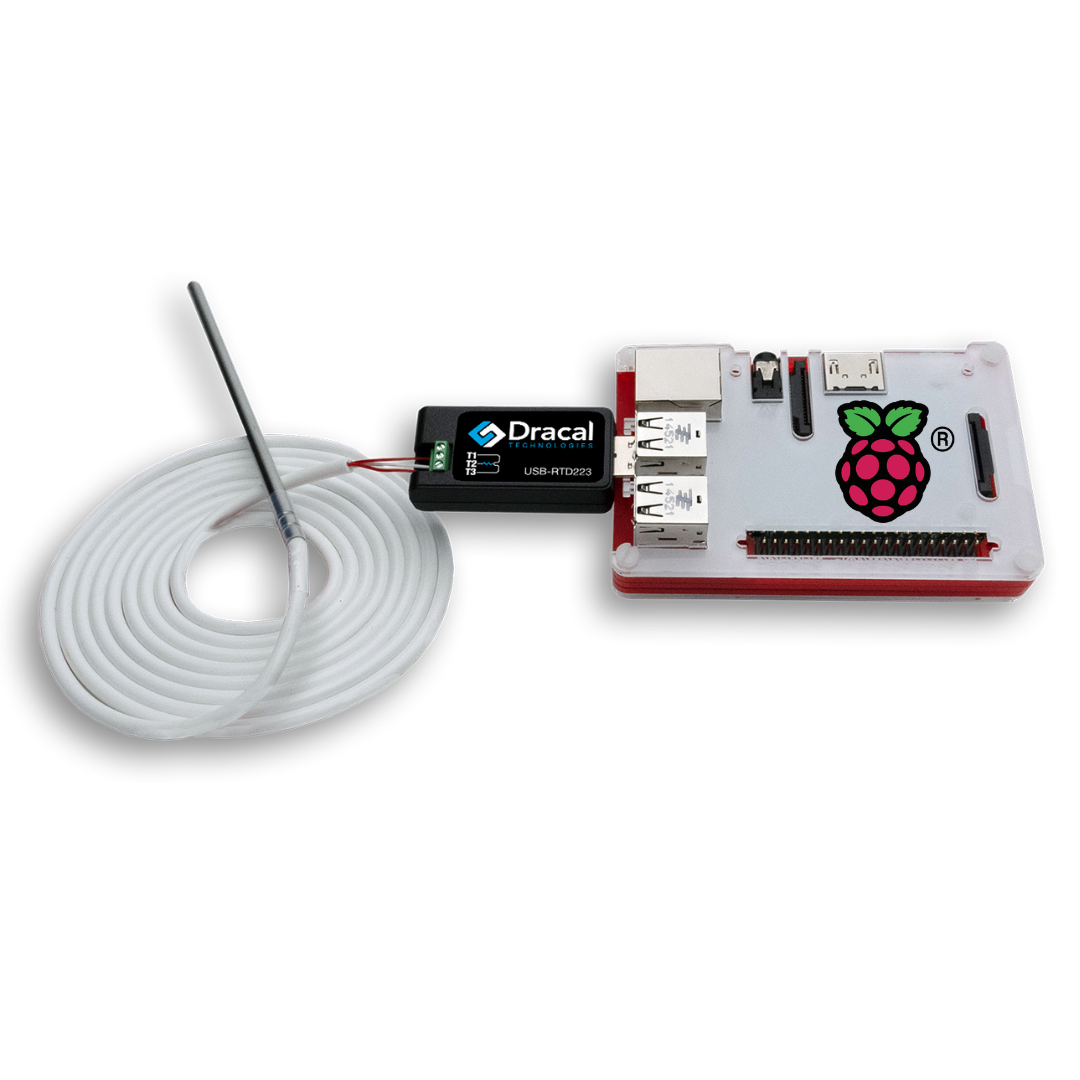
Dracal Technologies' solution is simple: plug in a USB port of the Raspberry Pi, the instrument of your choice, and measure! Since various instruments are available, you don't have to limit yourself to temperature measurements.
A Raspberry Pi is a Single Board Computer (SBC). Its low cost makes it an excellent replacement for a computer when the tasks to be performed do not require large memory capacities. Also, because it is small and energy efficient, it is ideal for small spaces and continuous operation. For example, you can turn your Dracal meter into a portable data logger using a Raspberry Pi.
In the spirit of Dracal Technologies making precision data acquisition accessible, here is a tutorial to help anyone with no programming knowledge to use our sensors with a Raspberry Pi.
The following outline will allow you to jump directly to the step of your choice. Note that a Raspberry Pi 3 Model B was used for demonstration purposes.
1) Configuring your Raspberry Pi
This first step assumes a completely blank Raspberry Pi at the start. If yours is already configured, you can skip to step 2 or overwrite the current partition.
From a computer,
-
Download the Raspberry Pi Imager from here
-
Insert the microSD card to be used into the computer, either in the appropriate port or using an adapter
-
Select the microSD card through the "Choose Storage" menu, then click "Write"
-
Once the operation has successfully completed, insert the microSD card into the appropriate port on the Raspberry Pi
-
Plug the power cable, an Ethernet cable*, a monitor, a mouse, and a keyboard into the Raspberry Pi
-
With network access, the Raspberry Pi will be able to complete the installation of the operating system
*Note: It is also possible to configure wireless network access on Raspberry Pi 3 and later models.
If you want to use your Raspberry Pi without having a monitor connected, you can consult the documentation page on remote access.
2) Downloading the software tools for Linux
Dracal Technologies offers free software tools to acquire data from its sensors. These tools are compatible with Windows, MacOS, and Linux. The operating system of a Raspberry Pi is a version of Linux based on Debian.
-
From the Raspberry Pi, open the web browser and go to Dracal's Software page
-
Download the Linux version, which is only available in source code
To use the software tools, Linux users must compile the downloaded files. The files will be collected and then translated into an executable programming language.
3) Installing the libraries needed to compile the software tools
To compile the Dracal software tools, your Raspberry Pi must contain specific libraries and programs. These indicate how to interpret the source files.
-
Using a terminal, ensure you have the most up-to-date software and libraries. Type the command:
:~ $ sudo apt-get update && sudo apt-get upgrade -
Install the packages required to compile the command line tools:
:~ $ sudo apt-get install build-essential pkg-config libusb-1.0-0-dev -
Install the additional packages required for the graphical user interface:
:~ $ sudo apt-get install qt5-qmake qtbase5-dev qtbase5-dev-tools qtscript5-dev
4) Compiling the command-line tools
The program will need special permissions to access USB devices. After granting them, the make command will handle all the necessary steps for compilation.
-
Assign the Raspberry Pi user to the
plugdevgroup::~ $ sudo usermod -aG plugdev $(whoami) -
Navigate to the
/etc/udev/rules.ddirectory and create a file named99-usbtenki.rulescontaining the following text:ATTR{idVendor}=="1781", MODE="0664", GROUP="plugdev" ATTR{idVendor}=="289b", MODE="0664", GROUP="plugdev"Note: The directory is protected and requires administrator rights to modify. One way to create the file is to use
sudo nanoto create the file. -
Extract the archive downloaded in Step 2:
:~/Downloads $ tar -xf DracalView-3.2.0.tar.xz -
Navigate to the the
/clientsubdirectory of the extracted archive and use the make command::.../DracalView-3.2.0/client $ make -
Reboot the Raspberry Pi to apply the permission changes.
5) Using the command-line tools
The command line tools should now be functional. This small test ensures the permissions are running correctly before compiling DracalView.
-
Connect at least one sensor to the Raspberry Pi.
-
Use the
dracal-usb-getprogram to list the devices connected to the Raspberry Pi::.../DracalView-3.2.0/client/build/bin $ ./dracal-usb-get -l -
Query the first sensor and return the data:
:.../DracalView-3.2.0/client/build/bin $ ./dracal-usb-get -f -i a
For all of our sensors delivered in USB mode, it is possible to program a dracal-usb-get query loop and send the data to another program.
Our other two command line tools are used to calibrate instruments that allow it (dracal-usb-cal) and to change the communication mode from USB to VCP for instruments with this option (dracal-usb-set).
Visit the relevant pages for complete documentation on the dracal-usb-get and dracal-usb-cal tools.
You must set up an SSH server if you want to use the command line tools without connecting a monitor to your Raspberry Pi.
6) Compiling DracalView
Since all the dependencies and permissions are already in place, only two steps remain to set up DracalView.
-
Navigate to the
/dracalviewdirectory, then use the Qt Makefile generation tool::.../DracalView-3.2.0/dracalview $ qmake -
Compile using the generated Makefile:
:.../DracalView-3.2.0/dracalview $ makeThis step will take a moment to complete.
Several minutes later, the DracalView executable file should have been created in this subdirectory.
7) Using DracalView
Run the DracalView GUI:
:.../DracalView-3.2.0/dracalview $ ./dracalviewThen, the graphical interface is used as shown in these different videos or written tutorials.
It is possible to use DracalView by accessing your Raspberry Pi remotely via a VNC server that will link a computer to the Raspberry Pi.
All of our USB measurement instruments work with a single-board Raspberry Pi computer. As mentioned in the introduction, Dracal Technologies' mission is to make precision data collection accessible. So not only a temperature sensor but also our CO2 sensor for air quality or an all-in-one instrument can be plugged into a Raspberry Pi, allowing you to measure what you need, where you need it.
Please contact us if you have any questions or comments. We will be happy to answer them.
References
Raspberrypi.org. (2023). Raspberry Pi - Setting Up. [online] Available at: https://projects.raspberrypi.org/en/projects/raspberry-pi-setting-up/0 [Accessed 6 Mar. 2023].
Raspberrypi.com. (2023). Raspberry Pi Documentation - Getting started. [online] Available at: https://www.raspberrypi.com/documentation/computers/getting-started.html#setting-up-your-raspberry-pi [Accessed 6 Mar. 2023].
Raspberrypi.com. (2014). Raspberry Pi Documentation - Configuration. [online] Available at: https://www.raspberrypi.com/documentation/computers/configuration.html [Accessed 6 Mar. 2023].